Managing ENVs In XCode With Schemes
March 6, 2016
This post is a small one about work flow in XCode. There’s no explicit way to have XCode set ENVs for you. When I started working with the IDE, I would simply comment or uncomment certain sections of code based on the ENV I was trying to target.
class MyAppAPI {
    static var debug: Bool = true
    static var baseURL: String {
        get {
            if debug {
                return "http://debug.someAPI.com"
            } else {
                return "http://someAPI.com"
            }
        }
    }
}
As your application grows though, this kind of code can pop up in multiple classes. You could deal with it by making a central config class/stuct, but the idea of continually changing a single variable in the code that would drastically change behavior felt like an unsafe thing to do. Also, I would like to know the context of the code I’m looking at without having to navigate back and forth between a config file to see what environment I am operating under.
XCode Schemes
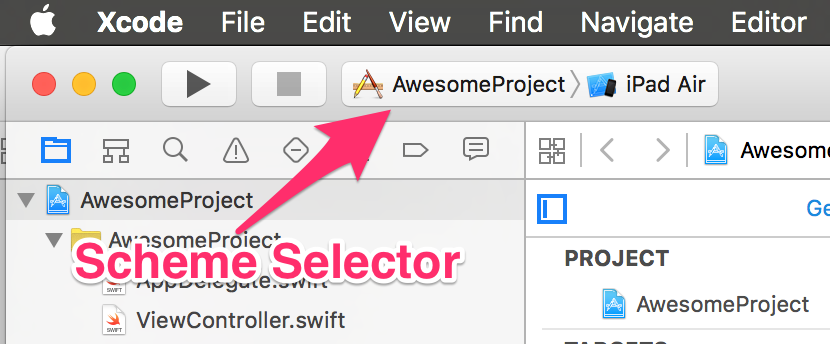
Xcode has a nice little drop down selector next to the device your targeting. It’s called the Scheme Selector:
Per the XCode Docs, here’s what they have to say about what a scheme selector is used for:
An Xcode scheme defines a collection of targets to build, a configuration to use when building, and a collection of tests to execute.
Ok, sounds like this little drop down might have something to do with what we want. But, how do we configure the Configuration to our liking?
XCode Configurations
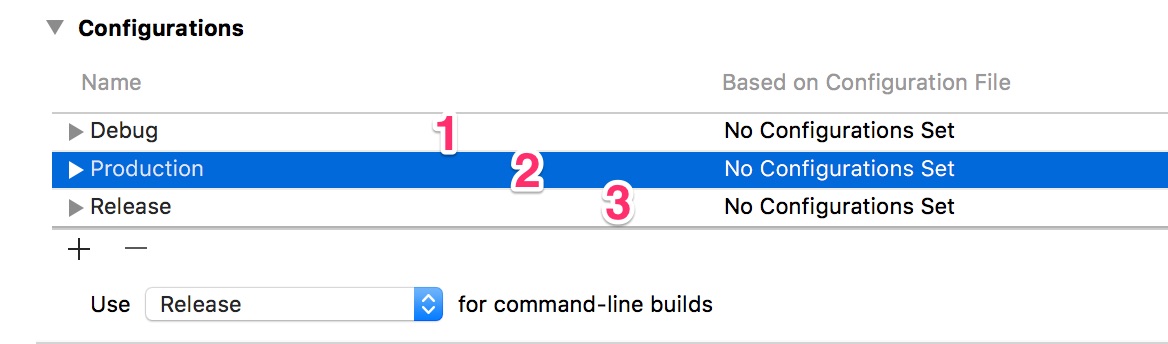
Turns out they’re not using the term ‘Configuration’ colloquially - XCode has something call ‘XCode Configurations’. You can mange them here:

While we’re here, let’s create a new configuration. We’ll call it Production and it should be very similar to our current Debug configuration. To do this, just find the + button on the bottom left below the existing configurations, and click Duplicate "Debug" Configuration. You should now have 3 configurations:
Scheme Editor
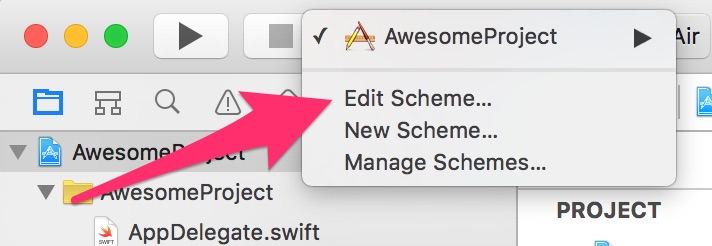
Configurations in XCode define the environment in which your code is running. The two there Release and Debug come for free out of the box, and are both used by your one existing scheme. To see how they are used by the default scheme, go to the scheme drop down, click it, then go to Edit Scheme.
That will bring up the Scheme Editor which then shows the settings for your current scheme. The thing we want to notice here is the subtext on the left, below the six titles (Build, Run, Text, etc.). Each of them specifies one of the configurations we saw earlier. The configuration is the context for the operation you’re performing with your project. So, if you hit Run and you load your in the simulator or a device, our current scheme will use the Debug configuration. But, if you wanted to archive your app for distribution, we can see that the Archive action uses the Release configuration.
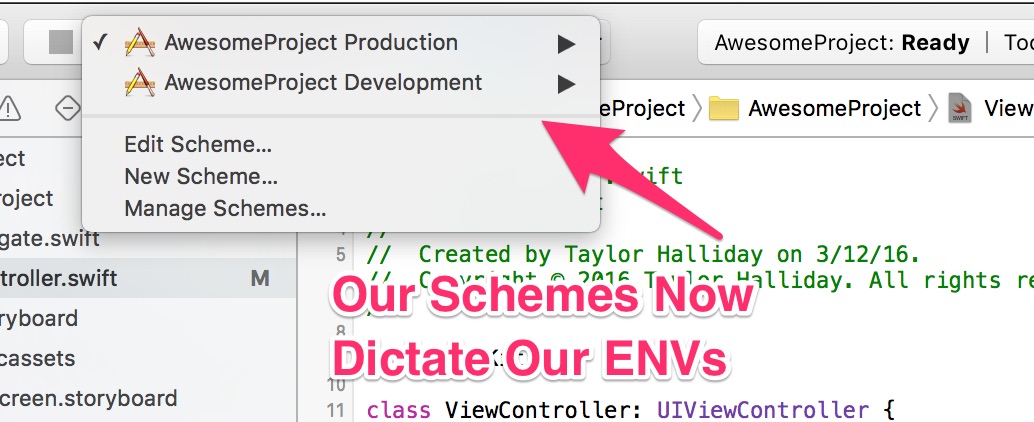
Next let’s make another scheme so that we can clearly tell when the project is using our development ENV vars vs production ENV vars. First, let’s hit ‘Duplicate Scheme’ in the lower left, then that will create a copy of the previous configuration and it will ask us for a name. Let’s use this to make our development environment, so let’s call it AwesomeProject Development. While we’re here, let’s change our archive command for this to use Debug so that when we distribute a development build, it’s using our Development ENVs.
Not to jump ahead, but the caveat with using our
Debugconfiguration here is that there’s a bunch of non-optimized XCode build settings that will ship with these archives. If you want to ship builds that are using optimized configurations, you should create a fourth configuration - call itStagingthat is duplicated from theReleaseconfiguration, and assign theArchiveaction to that configuration here.
Now, let’s go back to our other configuration and we’ll rename it to AwesomeProject Production and leave it alone.
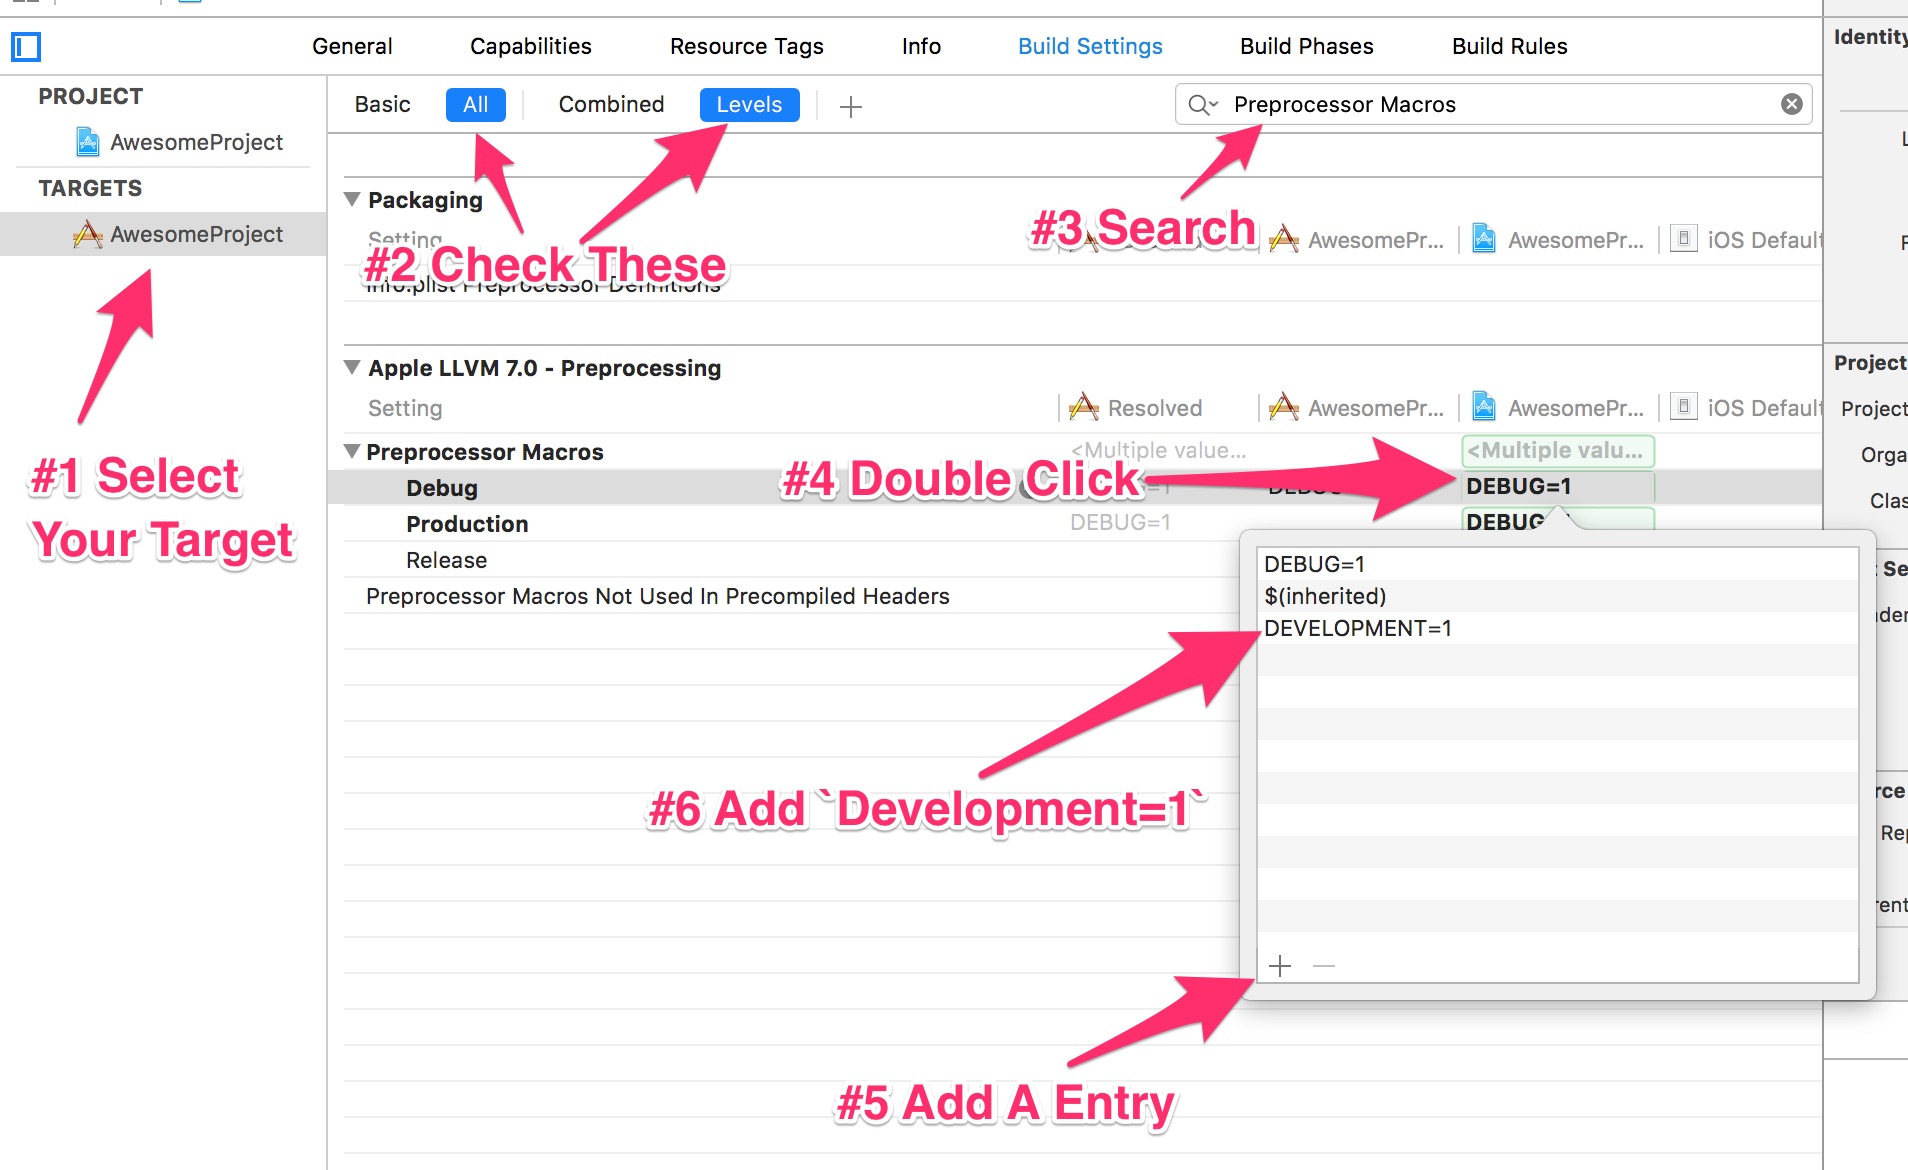
Preprocessor Macros n’ Build Settings
Next, we’re going to assign a preprocessor macro to a a specific environment. If you’re not familiar with Preprocessor Macros, you can think of them as a sort of global flag your compiler can inject. Head over to your Build Settings in your project navigator, search for Preprocessor Marcros, and open up the selection that is shown. If you expand the line item, you’ll see our configurations we saw earlier. Double click the green shaded box with the current DEBUG flag in there, and add another entry.
Preprocessor Macros n’ Code
Now that we’re all setup, let’s go to some actual code and make this configuration mess actually do something for us. The preprocessor macros we set can be picked up in code by using some slightly unfamiliar syntax:
static var baseURL: String {
    get {
        let baseURL: String
        #if DEVELOPMENT
            baseURL = "http://debug.someAPI.com"
        #else
            baseURL = "http://someAPI.com"
        #endif
        return baseURL
    }
}
Now, all we have to do is select the appropriate scheme, and it will select the appropriate ENV var we want. You can use this to set things like URLs, but you can also use it to set a range of other things such as UI Defaults, build optimizations, testing configurations, and more.